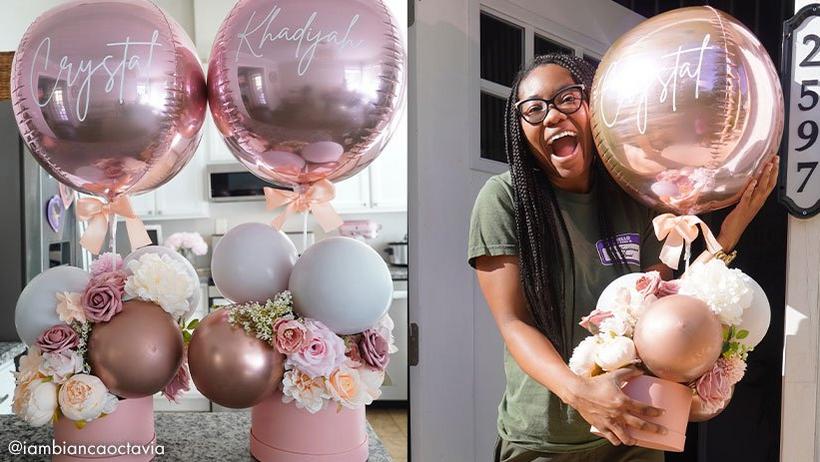
Balloon baskets are one of the trendiest, most creative ways to surprise a friend or family member for a birthday, baby shower, special anniversary, to say “Congratulations” or even just “Thinking of You”. Premade balloon baskets are beautiful, but can be expensive. A DIY balloon basket, on the other hand, is super easy to make, and cost-effective, too! Plus, when you make a balloon basket yourself you can customize it as you please, and make sure that special someone knows how much you care.
But first, you might be wondering: what is a balloon basket?
A balloon basket is a gorgeous, unique arrangement of balloons accessorized with flowers, lights, or sweet treats, all set in a small basket or gift box. Custom balloon baskets are fun to make and a surprise to receive. Balloon baskets are the perfect present for so many situations: Not sure what to give? Want to send a surprise? Don’t want to send flowers? Balloon baskets take the guesswork out of gift giving. What could be better than a basket full of love?
So, let’s get to it, and build our very own balloon basket!
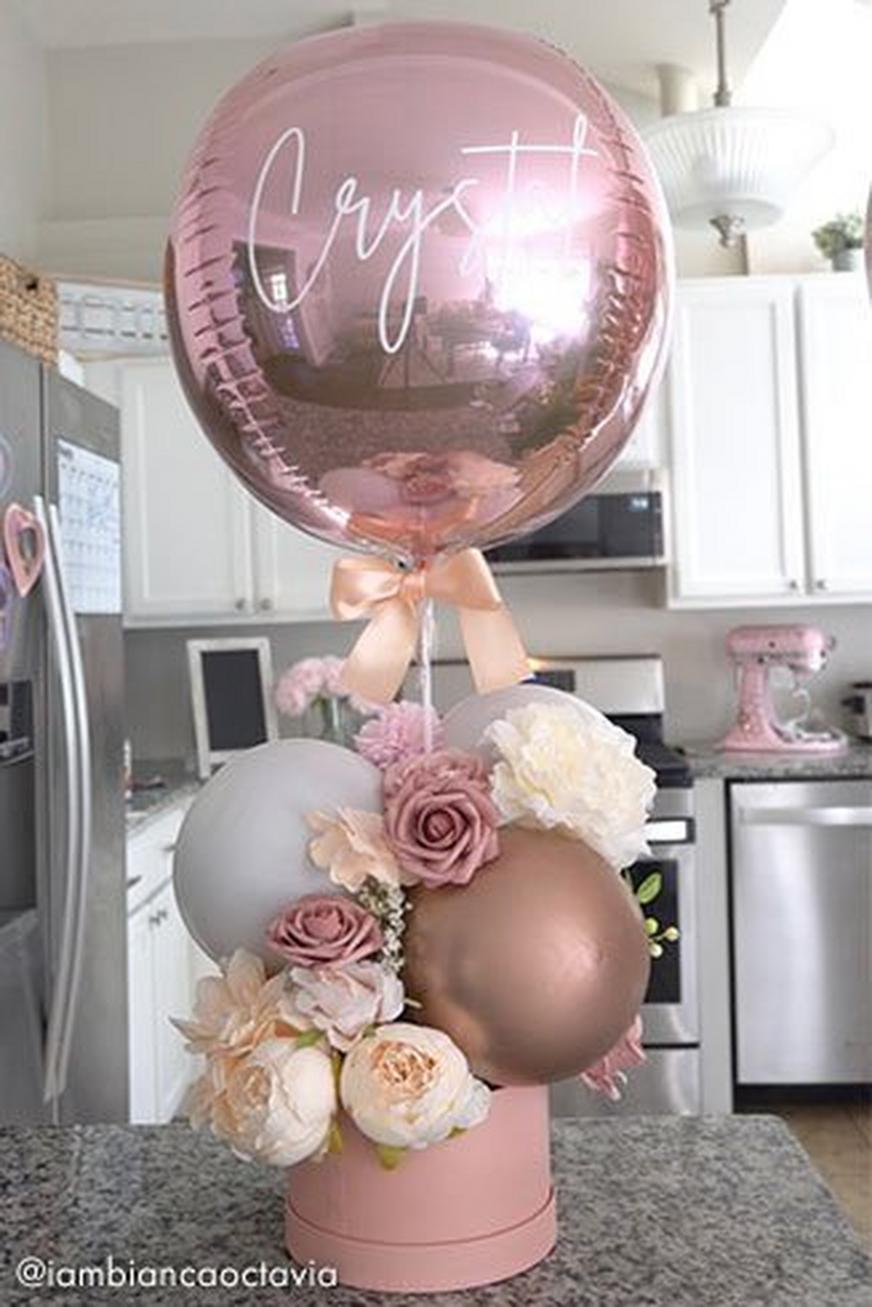
Balloon Basket
Assembly Time: Est. 15 minutes
Balloon gift baskets require minimal effort, and with the right materials you can build one or several in no time. And once you know how to make a balloon basket, you can easily customize each gift for the recipient.
What You’ll Need:
Decorative box or basket
Florist foam
2 x 12-inch balloons in any color
2 x 9-inch balloons in a complementary color
1 balloon stick
1 large phrase, number or character balloon to celebrate the occasion
Ribbons
Flowers—real or artificial
Balloon pump (optional)
Step 1: Inflate the balloons.
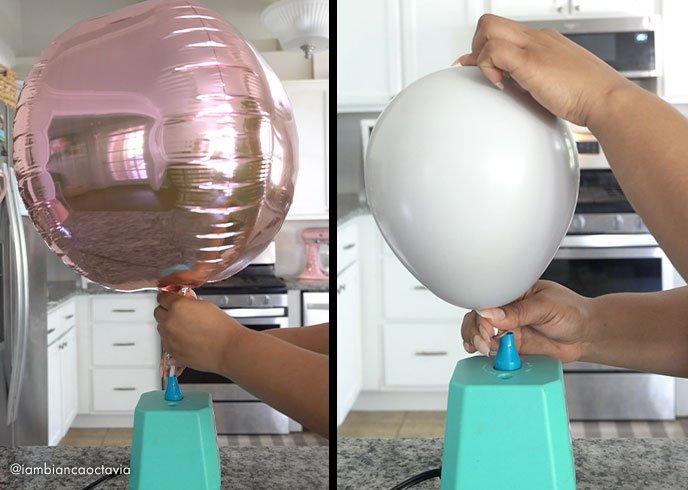
a) Using an electric balloon pump, inflate two 12-inch balloons and tie their ends together. Remember to leave a little space when inflating for easy tying. You can also inflate the balloons manually, but we recommend the Balloon Buddy, as it makes the process quicker and easier.
b) Repeat the process with two 9-inch balloons and tie their ends together. For a small box, these four balloons will be ideal, but if you have a larger box or basket, you can add a few more balloons to fill it.
c) Inflate a special occasion balloon. This will be the statement balloon at the top of the balloon basket.
Pro Tip: Choose the phrase, number or special character balloon first, then select your 9- and 12-inch balloon colors to coordinate. This will help create a striking, cohesive theme for your balloon basket.
Step 2: Build the balloon basket base.
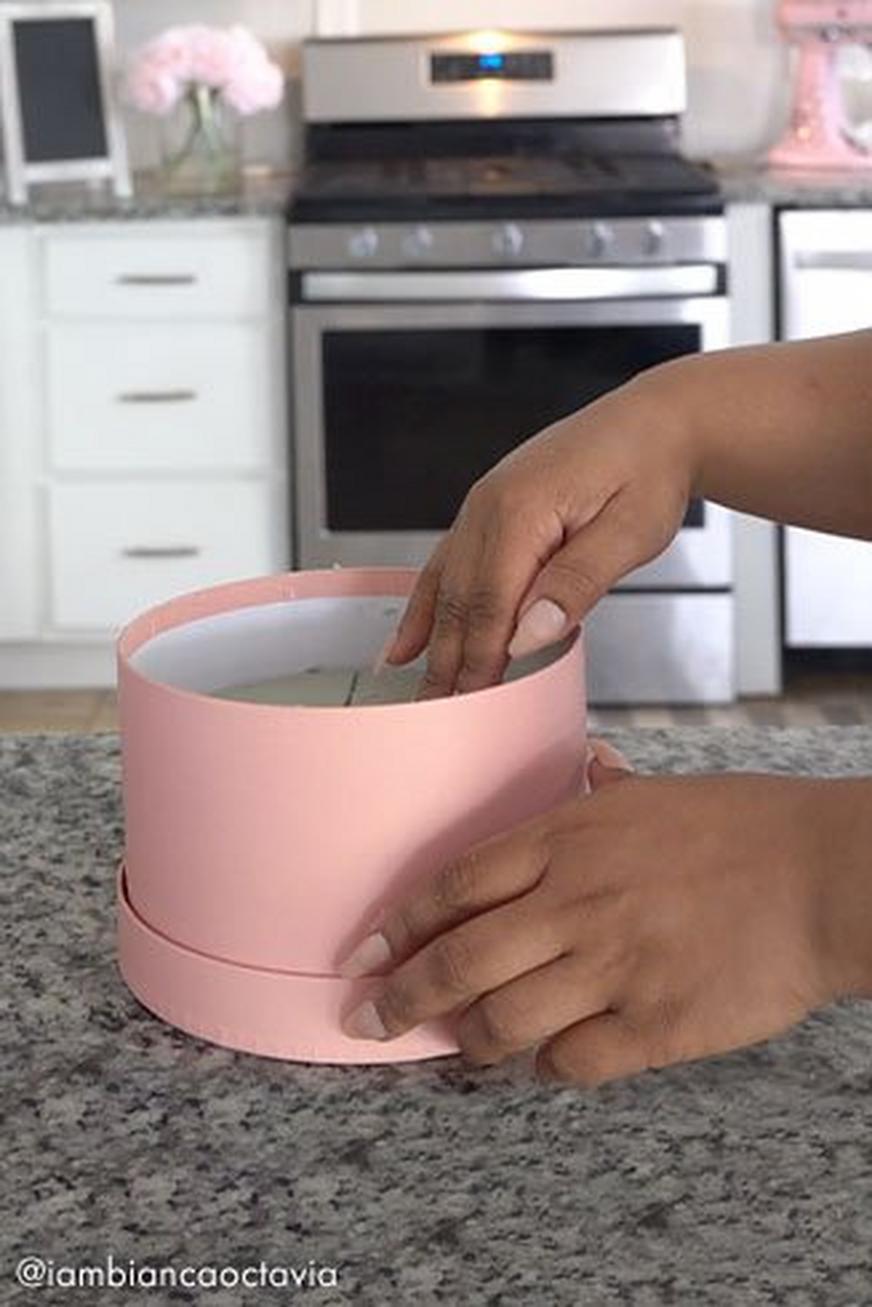
a) Place your gift box or basket on a flat working surface. If the box has a lid, remove and discard it. Make sure the box or basket is sturdy enough to hold the weight of the decorations you’ll be adding.
b) Measure the box and cut the florist foam to size, filling up the box. This will act as a base to poke in flowers and the balloons on balloon sticks.
Tip: The size of the box will guide the size of your balloon basket; if the box is too small, it will not be able to hold very many balloons and flowers. The bigger the better!
Step 3: Tie the balloon to the balloon stick.
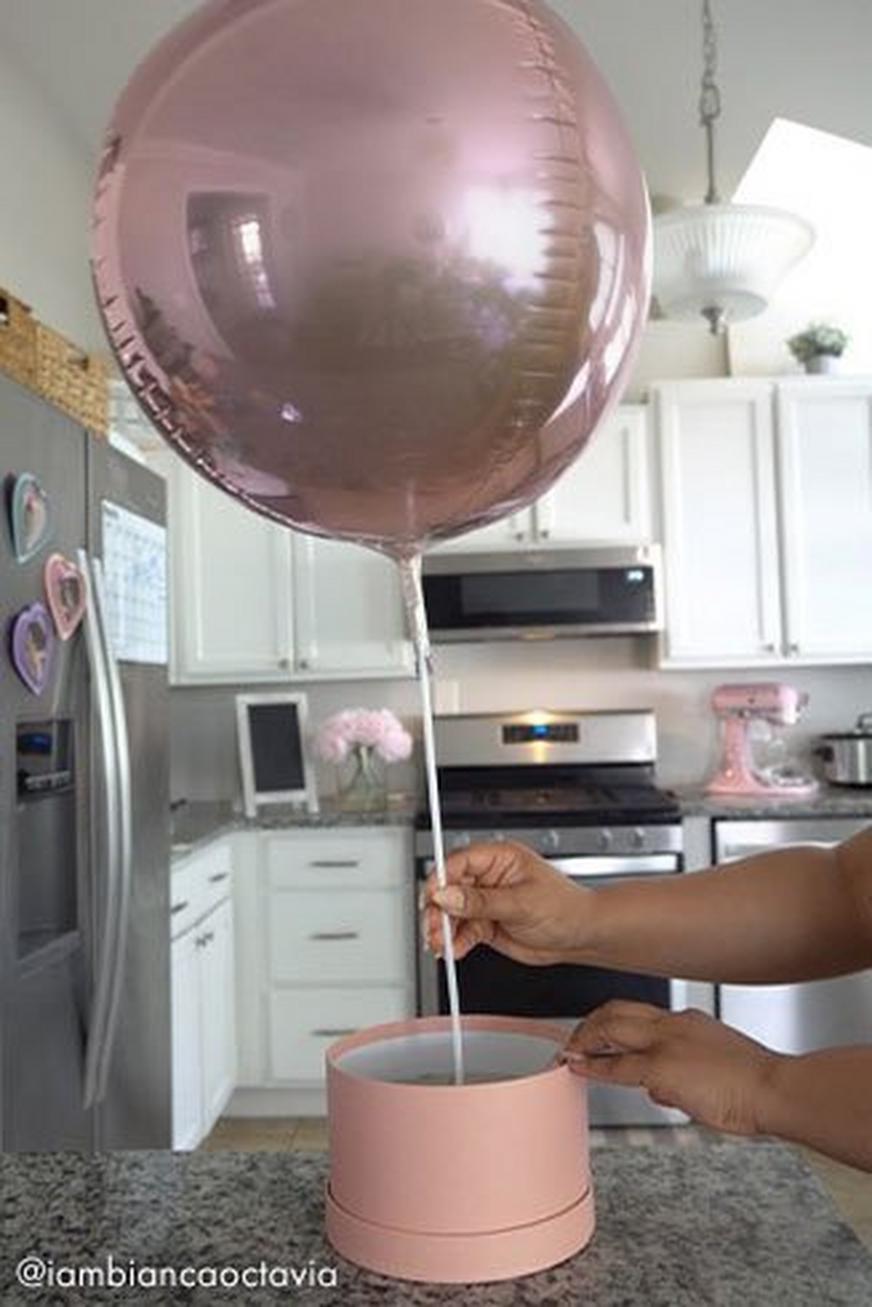
a) The phrase, number, or character balloon is the focal point of the arrangement. We want our special balloon to stand out in this creation, so we’ll attach it to a balloon stick.
b) A balloon stick with the cup attached has two slots to tie your balloon in.
c) Take the end of your phrase balloon, stretch it out, and loop it through the first slot.
d) Keeping the balloon securely in hand, loop the end through the second slot. Twist the end and wrap it through the first and second slot again until it is taut, or simply make a knot.
Tip: While inflating the phrase balloon, make sure that it is not filled to its capacity. The longer end will give us more room to work with when it comes to tying the balloon to the stick.
Step 4: Assemble the balloon basket.
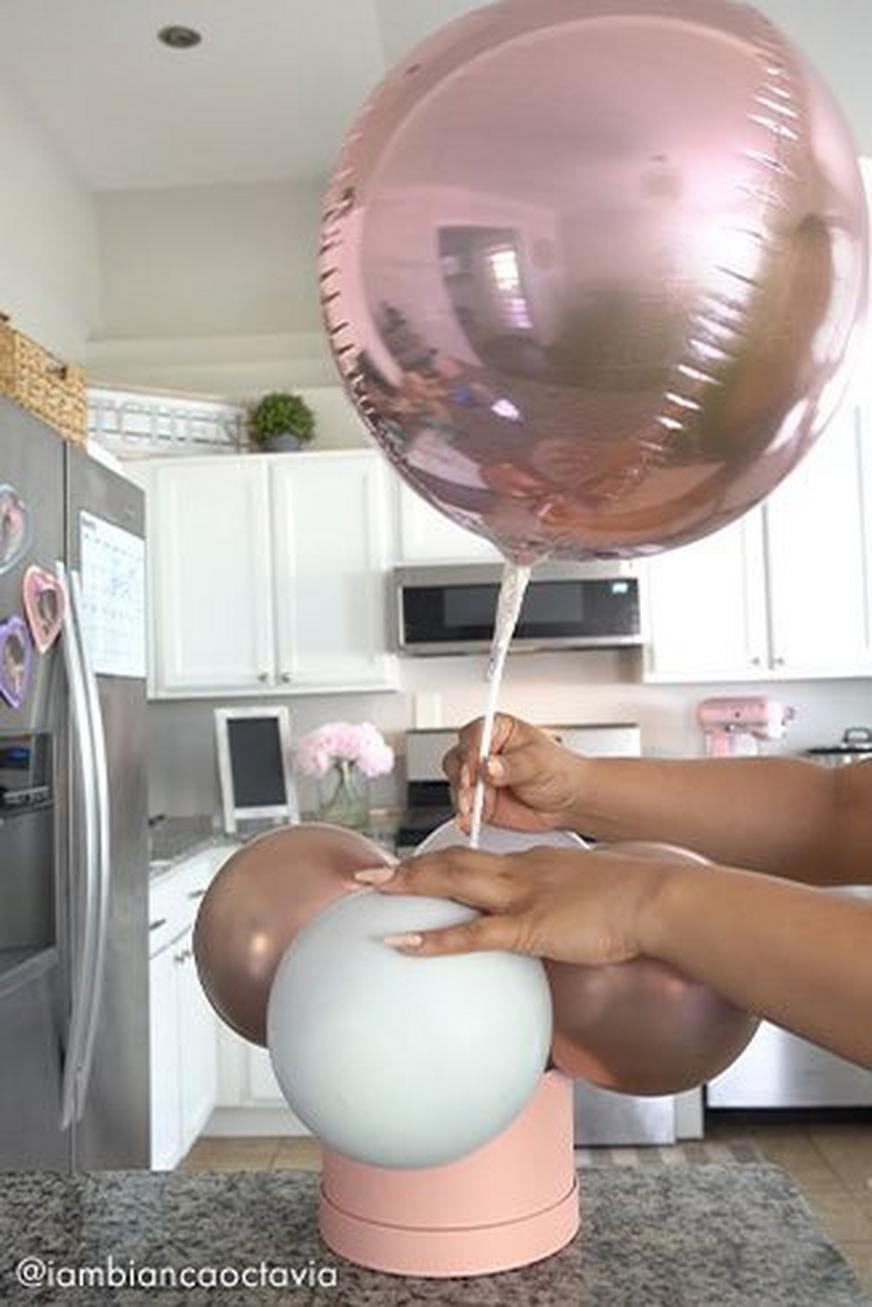
a) Taking the base that we built (box/basket and florist foam), insert the balloon stick with its attached feature balloon into the center of the basket. The florist foam will help keep the stick in place.
b) Now it’s time to add in the rest of the balloons. Grab the sets of two balloons that we tied together. Take the first set and twist it around the balloon stick. Twist until they are secure in place.
c) Repeat the process with the other sets of balloons. Twist around the balloon stick.
d) Push and adjust the balloon's positions to look as aesthetically pleasing as you would like. You can alternate the smaller balloons with the bigger ones too. It’s all up to you!
e) The mismatched assembly of the balloons in different sizes and colors will give it a fun and bubbly look.
Tip: Play around with the décor placement; there’s no right or wrong way of making the basket look good. You can have a clean and uniform look, or an asymmetrical and fun look, anything works!
Step 5: Finishing touches!
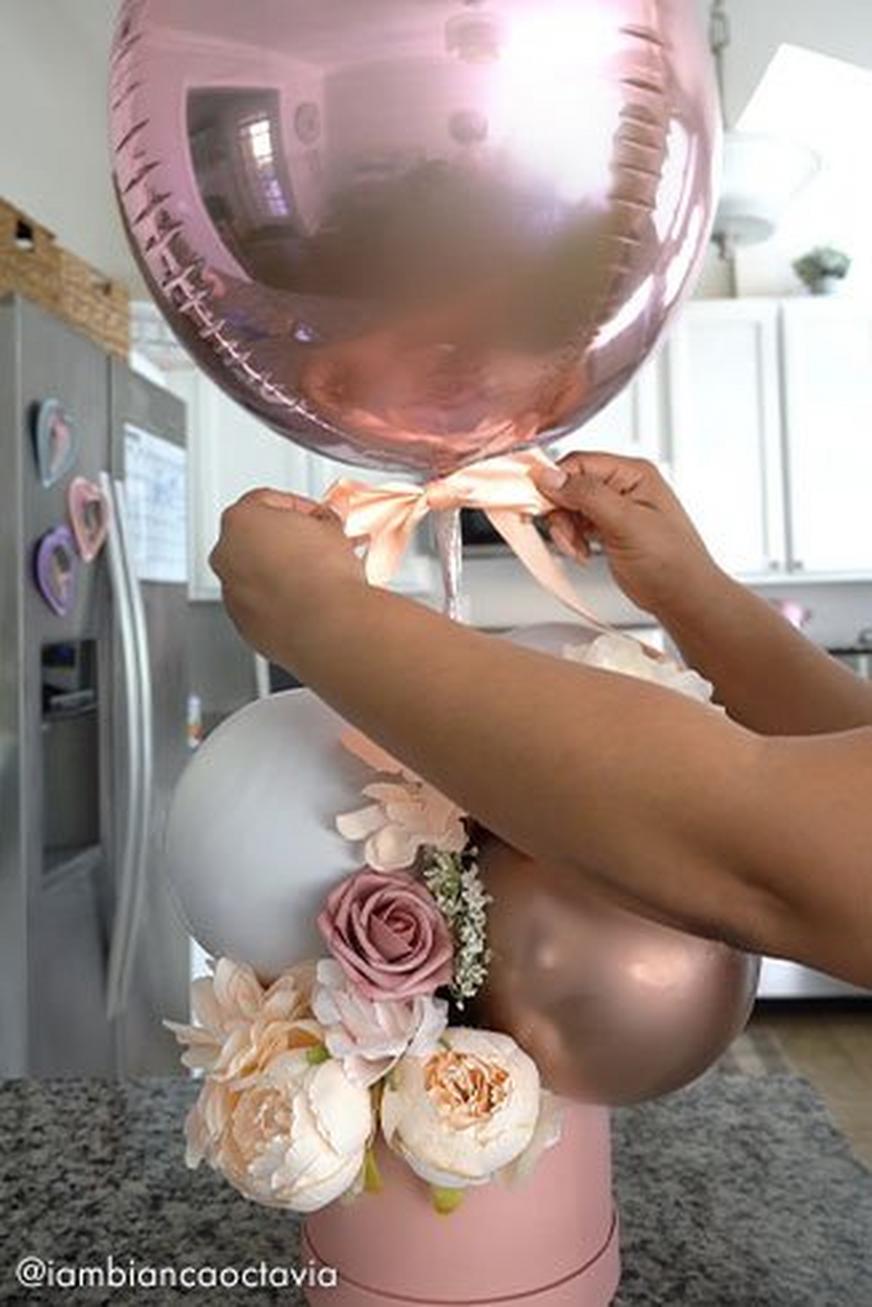
a) Now that the balloons are in place, it’s time to add in some extra decorations to take our balloon basket from nice to extravagant.
b) Insert flowers at the base and in between the balloons. Make sure that the stems go all the way through to the florist foam, as this will ensure that they stay in place.
c) Using a wide, decorative ribbon that matches your color scheme, tie a bow around the neck of the balloon stick, just under your feature balloon.
d) You can add in fairy lights, sparkles, a special note, or even chocolates at the base of your basket. Let your imagination run wild!
And voila! Your special, one-of-a-kind balloon basket is done!
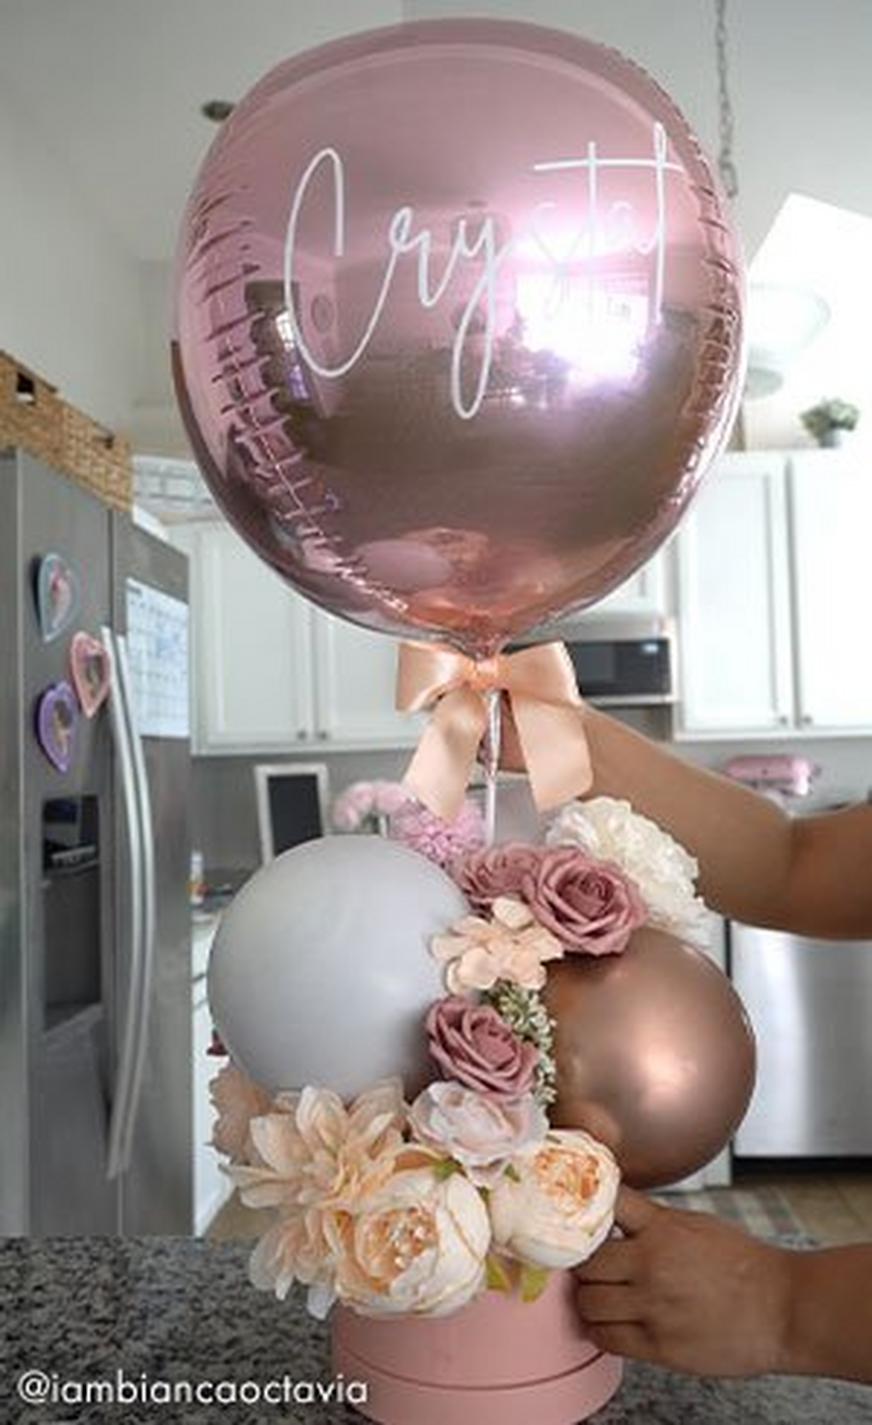
Balloon baskets are easy, convenient, cost-effective, and heartfelt gifts that absolutely anyone can make! You could also make this DIY masterpiece along with friends and family, creating an activity for everyone to take part in.
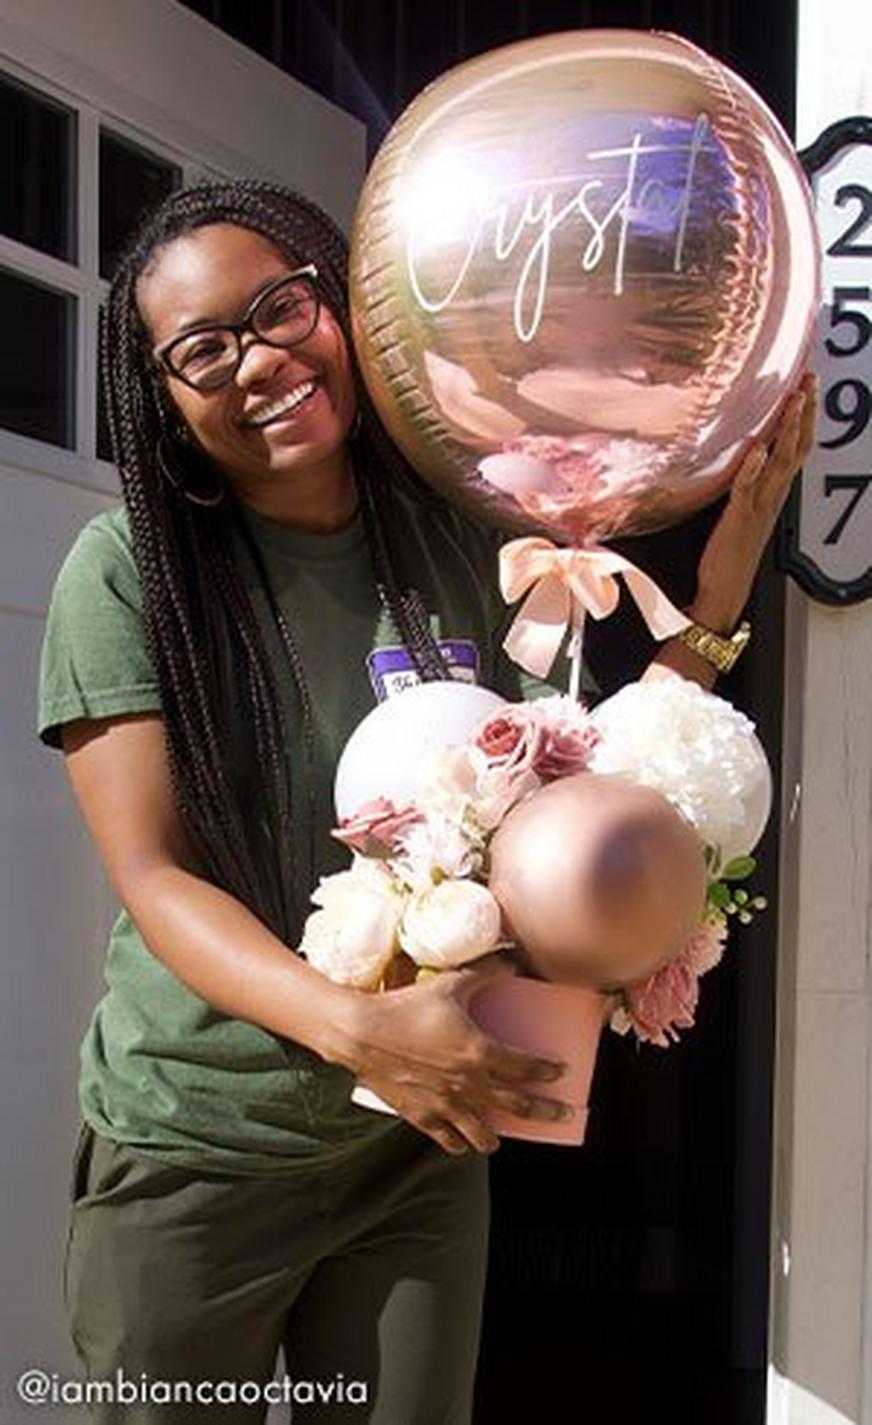
If you take this balloon basket idea as a starting point, you can go on to build bigger and better baskets with your own customizations. There are a number of uses for these gorgeous creations, like using the balloon baskets as centerpieces at weddings, birthday parties, or other events.
Create your own DIY balloon basket today and let us know how it turns out!
For more party décor & balloon inspiration check out our other Balloon Basics Guide.
