Have you ever struggled to tie a balloon and ended up with a bunch of air escaping? No one wants to deal with deflated balloons, especially if you have a party to plan! Thankfully, we’ve got you covered with a step-by-step tutorial on how to tie a balloon.
Let's Get Started: An Easy Way to Tie Balloons
To get started, all you need is a balloon, your hands, and some patience. Follow these simple steps to become a balloon-tying pro.

Understand The Anatomy of a Balloon
Before diving into the steps, it's important to understand the various parts of a balloon: the body and neck. The body is the main part of the balloon that holds the air, while the neck is the narrow part that connects to the body.
1. Blow Up Your Balloon
The first step to tying a balloon is inflating it. You can use a handheld or electric pump or blow it up with your mouth. Be sure to inflate the balloon to the desired size, but don’t over-inflate it so it doesn’t pop! If you're blowing it up with your mouth, ensure a tight seal between your lips and the balloon’s lip to prevent air from escaping.
2. Pinch The Balloon’s Neck
Once the balloon is inflated, pinch the neck of the balloon with your fingers, keeping it as close to the body of the balloon as possible. This will prevent air from escaping and maintain the shape of the balloon while you tie it. Keep a firm grip but don’t apply too much pressure — this could cause the balloon to pop.
3. Stretch Its Neck Out
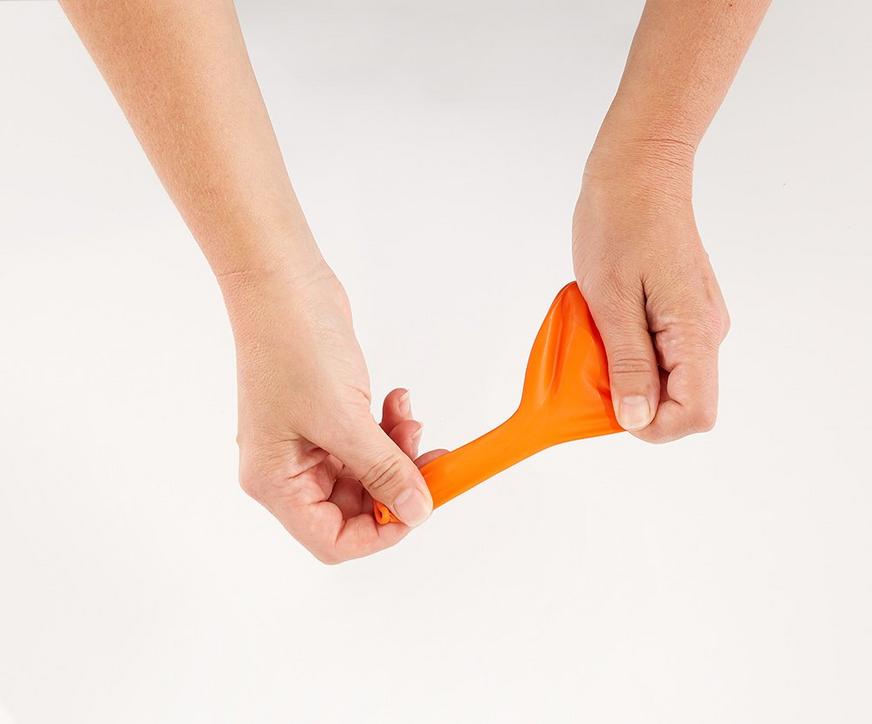
With your other hand, grasp the lip of the balloon and gently pull outward, stretching the neck of the balloon. This creates a more flexible section that makes it easier to tie later. Remember not to tug too hard because too much force could make the balloon burst.

4. Pinch The Balloon’s Neck between Your Index and Middle Fingers on One Hand
Now, with the hand that was pinching the balloon's neck, transfer the grip from your thumb and index finger to between your index and middle fingers. Make sure you maintain a tight grip to prevent air from escaping or the balloon from slipping out of your fingers.
5. Pull The Balloon Lip toward You with Your Non-Pinching Hand
Use your free hand (the one that stretched the neck) to grasp the lip of the balloon and pull it towards you. This may take a little effort, but it will provide enough slack in the stretched neck to create a loop for tying.
6. Loop The Stretched Length of Neck Over The Top of Your Pinching Hand's Thumb and Index Finger
With the lip in one hand and a tight grip on the balloon's neck with the other, loop the stretched section over the top of the pinching hand's thumb and index finger, maintaining a tight grip on the neck. This forms the necessary loop for tying the balloon.
7. Transfer the Lip from Your Looping Hand to Your Wrapped-Up Finger and Thumb
Now, take the lip from your non-pinching hand and transfer it to the fingers wrapped around the balloon's neck. This move will provide further slack and make it easier to form the balloon knot.
8. Pull The Lip Backward through the Loop You've Created
With the lip transferred to your pinching hand, pull it back through the loop you've created, maintaining the grip on the balloon's neck. This will form a knot that keeps the air from escaping and holds the balloon’s shape.
9. Allow The Loop to Slide Forward Off Your Fingers
Finally, slowly release the grip on the balloon's neck, allowing the loop to slide forward off your fingers. This motion tightens the knot you've created and secures the balloon. Give your finished knot a gentle tug to make sure it's sturdy and well-formed. Congratulations! You now have an inflated balloon that’s securely tied.

With practice, tying balloons will become second nature, and you'll be able to decorate parties, events, and all kinds of celebrations. The key is being patient and gentle with the balloons and finding the right balance between keeping a tight grip and not over-stretching the balloon material. Good luck, and happy tying!
Are you throwing a party and looking to spice it up with balloon decor? Party City has everything you need to make your event extra special. From balloon arches and garlands to birthday balloons, you can explore our variety of products that are perfect for any occasion. Browse our balloon selection today or find a store near you.

Frequently Asked Questions
How do you seal a balloon without tying it?
If you don’t want to tie a balloon knot or use a balloon-tying tool, you can seal it using other methods. One way to do so is to use a balloon sealer machine. This device heat-seals the neck of the balloon after it’s inflated.
Another option is to use a balloon clip, which can be clamped onto the neck of the balloon to hold the air inside without tying it. Some people also use a rubber band or twist tie to secure the neck of the balloon instead of tying it.
Does putting tape on a balloon stop it from popping?
No, putting tape on a balloon doesn’t prevent it from popping when it’s inflated. Balloons pop because of the air pressure inside of them. To prevent a balloon from popping, remember to handle it gently, don’t over-inflate it, and don’t expose it to sharp objects!
What can I use to hold down balloons?
You can use balloon weights or attach balloons to heavy objects such as a vase, a bag of sand, or a rock. You can also tie balloon strings to chairs, tables, and other stable objects to keep them from drifting away.
